Considering that I want to start small with some new posts, I thought a good topic is Zoom room controls. These are quick and easy to use once you know the configuration file structure, and sometimes you don’t even need a physical control processor! Isn’t that where all of this is headed anyway?
Zoom
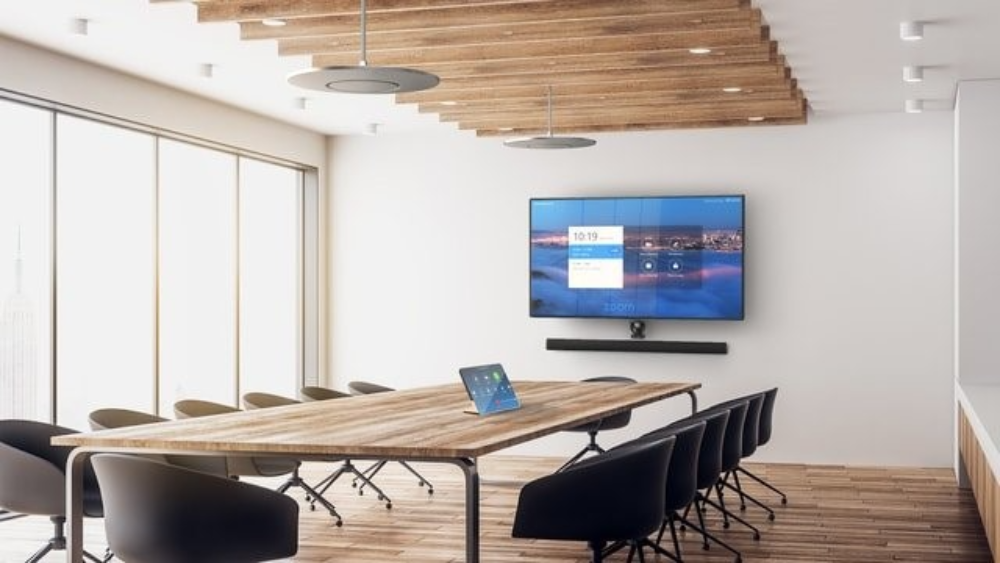
Everybody uses Zoom. Some of us get to use fancy Zoom Rooms that run on a wide variety of platforms: Logi, Poly, Crestron, etc. Zoom Rooms typically have a bit more going on than running Zoom on your laptop:
- Large displays at the front of the room
- Integrated room audio
- Content sharing (wireless or hard-wired laptops)
- Lights and shades
I’m sure you can think up a few more things to control, but lets not get too far ahead just yet. There are some requirements spelled out that need to be met before any of this stuff will talk to each other.
Zoom Portal
To mess around with Zoom room controls, you need to have access to the Zoom portal. Once you’ve logged in, you can navigate to Room Management and change the settings for your particular room. Enable Room Controls is found under the Devices section:

Then it’s all about creating a room controls profile… using JSON!
JSON
JSON is the worst part about Zoom room controls. It’s a format that is very picky about commas, doesn’t allow comments, and needs matching braces everywhere. I use VS Code to edit JSON files because it highlights problems before I go through the effort of loading them into Zoom.
If you already know JavaScript, JSON will look very familiar. And if you don’t know JavaScript, you can learn the bits that JSON uses very quickly.
Objects use curly braces { }. If I wanted to create an object representing a fancy car, I could:
{
    "make": "Toyota",
    "model": "Supra",
    "year": "2024"
}
Vroom! Vroom! Arrays use square brackets [ ]. If I wanted to create a garage full of cars, I could:
{
    "garage": [
        {
            "make": "Toyota",
            "model": "Supra"
        },
        {
            "make": "Acura",
            "model": "TLX"
        },
        {
            "make": "Nissan",
            "model": "Z"
        }
    ]
}
I’ve only used strings for values so far, but JSON also allows: numbers, Booleans (true/false), objects, arrays, or null. We’ll only need strings when dealing with Zoom.
Bare-bones
Lets take a look at a minimal profile that we can start to build on. I’ll give you a link to GitHub at the end with a good templated file you can download, too.
{
  "about": {
    "type": "Zoom Room Controls",
    "version": "1.0.0",
    "author": "Kiel Lofstrand"
  },
  "adapters": [

  ],
  "styles": [

  ],
  "rules": {

  }
}
Notice that the whole file is actually one big object. We define properties (or sections) such as: about, adapters, styles, and rules.
Adapters is an array that tells Zoom how to communicate with the physical world around it. Styles allow us to mark up how the user interface looks (can’t do a whole lot with it though). Rules give us a means of automation without needing a control processor! It’s all Zoom-related automation, but that’s what we’re here for.
Adapters
You need something that Zoom can talk to over a network. Good news: lots of things are network enabled now! But some devices are still easier or more reliable to control using tried-and-true RS-232.
You can use a device–such as the Global Cache IP2SL–to allow Zoom to control something via RS-232. You send commands to the IP2SL over the network and it will blast them out its serial port. The responses from the controlled device are also sent back to you over the network. Or if you want to be cheap, you can go on eBay and look for old Crestron QM-RMC’s just wanting to feel loved again! Only $20!
I’ll stick with the Global Cache IP2SL for now since it is supported by Zoom. Let’s update the adapters section of our config to add one:
"adapters": [
    {
        "model": "iTachIP2SL",
        "ip": "192.168.1.50",
        "uuid": "GlobalCache_001122334455",
        "ports": [

        ]
    }
],
ip points to the IP address of the IP2SL and uuid is made up of the string “GlobalCache_” followed by the device’s MAC address. ports will be filled in next.
Ports
We can think of ports as the device we’re controlling on the other end of the gateway (IP2SL) that we’re talking through. So this would be the display, shade controller, status light, whatever.
Lets add a display to our ports section:
"adapters": [
    {
        "model": "iTachIP2SL",
        "ip": "192.168.1.50",
        "uuid": "GlobalCache_001122334455",
        "ports": [
            {
                "id": "display",
                "name": "Display",
                "settings": {
                    "baud_rate": "9600",
                    "flow_control": "FLOW_NONE",
                    "parity": "PARITY_NO"
                },
                "methods": [

                ]
            }
        ]
    }
],
Here we specify the serial port settings used to control that device (9600 baud, no flow control, and no parity). These might have to be set on the gateway device you’re using, or in the case of re-using a Crestron QM-RMC (wink wink), configured in the program you’re running on it.
Methods
We know where we’re pointing. We know how the device likes to talk over RS-232. But what commands can we send to it?
This is where we start filling out the methods section to tell Zoom how to make our display do something. We’ll keep it simple for now, just power on and power off:
"ports": [
    {
        "id": "display",
        "name": "Display",
        "settings": {
            "baud_rate": "9600",
            "flow_control": "FLOW_NONE",
            "parity": "PARITY_NO"
        },
        "methods": [
            {
                "id": "power",
                "name": "Power",
                "type": "actions",
                "command": "POWR%   \\x0D",
                "params": [
                    {
                        "id": "on",
                        "name": "On",
                        "value": "1"
                    },
                    {
                        "id": "off",
                        "name": "Off",
                        "value": "0"
                    }
                ]
            }
        ]
    }
]
This might look confusing at first, but it lets us group the power commands together. We define a pattern for the command using “POWR% \\x0D” then tell it which values get substituted in for each function using the params array. In this case, Power On ends up looking like “POWR1 \x0D” and Power Off looks like “POWR0 \x0D“. Looks like a Sharp display to me!
Styles
We’re done with adapters for now, lets move on to styles. We’re going to add a TV icon next to our display controls so they stand out a little better:
],
"styles": [
    "display.icon=icon_tv"
],
"rules": {
Here’s how it looks with our icon:
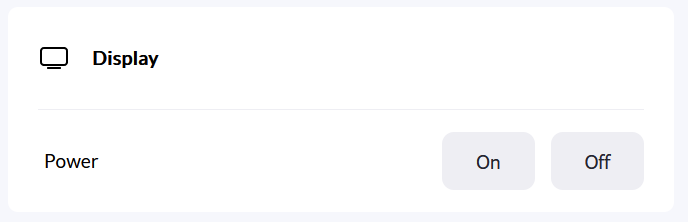
Many thanks to Jeff McAleer and his awesome Zoom Native Room Controls Preview tool so I could quickly grab a snapshot of how this would look!
A full list of icons is available on Zoom’s help site if you scroll down to the Styles section. It’s not the best selection…
Rules
The last section we’ll look at is rules. Wouldn’t it be cool if the TV automatically turned on when our meeting starts? It can be done!
    ],
    "rules": {
        "meeting_started": [
            "display.power.on"
        ]
    }
}
What we do is match one of the Zoom events (meeting_started) and tell it which buttons to automatically push. So where did we get display.power.on from?
If you look back up at the ports section of our adapter, you’ll see we gave it an ID of display. Within the methods section of that port, we gave the power commands an ID of power. And each parameter for our command receives their own IDs: on and off. So pointing to display.power.on means Zoom will fire off the string “POWR1 \x0D” to our display.
What happens if we have more than one display? We’d have to have unique IDs for each port, maybe displayLeft and displayRight. Then we could turn both of them on in our rules block with:
    ],
    "rules": {
        "meeting_started": [
            "displayLeft.power.on",
            "displayRight.power.on"
        ]
    }
}
Some of the other more useful rules include: microphone_muted and microphone_unmuted (to sync mute status LEDs on the mic itself), operation_time_started and operation_time_ended (control the room lights), and meeting_ended (turn off the display).
Summary
I think this was a gentle intro to Zoom room controls. You can grab this bare-bones template from my GitHub.
I’d really like to explore using a cheap QM-RMC as an IP-to-Serial device next time around. Stay tuned!

One thought on “Zoom Room Controls”