
I think the Q-SYS ecosystem is great; they really got a lot of things right. Like all things on this blog, I’m still learning and documenting the process. Coming off a recent job, I want to share a snippet of Lua code I wrote that I found incredibly useful. Hopefully it will save you some time, too.
My first foray into Q-SYS programming was strictly audio, control being handled primarily by Crestron (via Named Controls). I still end up doing a lot of that, but have also had the joy of working in strictly Q-SYS environments too. Some things end up being easier if you fully embrace one, but often times we end up straddling between multiple control systems all trying to play nicely together.
I don’t design ’em; just program ’em!
Lets program a DSP!
You’re going to need Q-SYS Designer to follow along with this blog post. The current version is 9.12.1 and seems to work great. I highly recommend updating if you haven’t already!
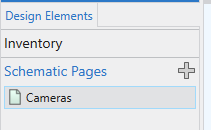
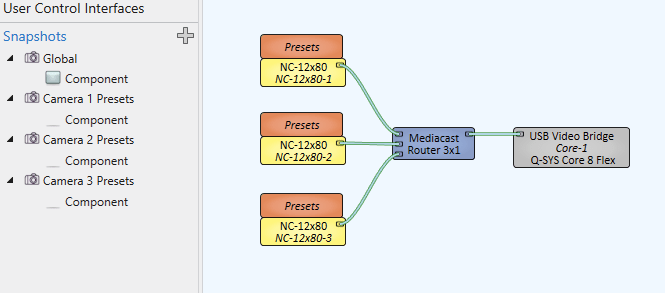
I’m going to create a new schematic page named Cameras:
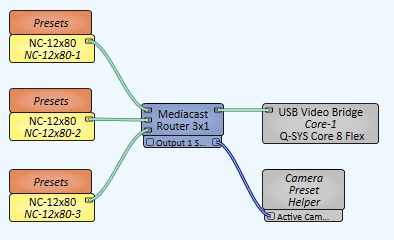
In our inventory, I’m going to add a couple devices to get a camera routing situation setup:
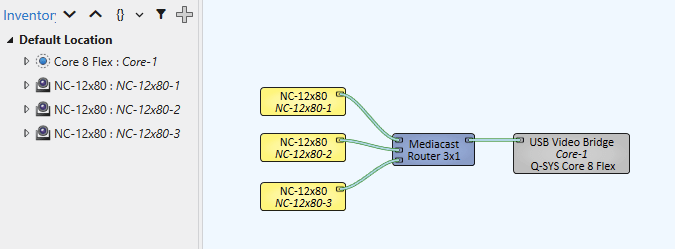
That’s it! We’ve got 3 cameras that can now be routed to our video codec (lets be real, it’s probably a Zoom PC at this point).
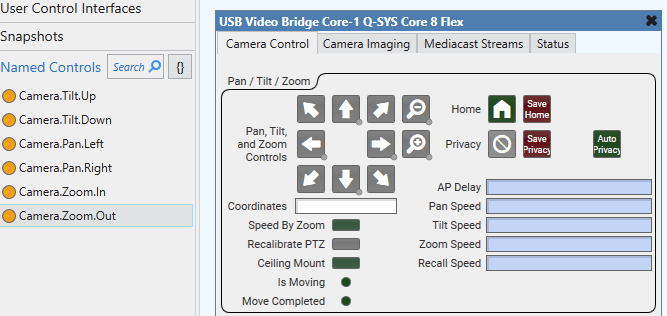
For this example, we’ll say we have another control system that will be handling the UI. We need to give names to all the controls we want to expose. Open up the USB Video Bridge block and assign names to all the PTZ controls:
We also need a way of choosing which is the active camera, so lets name the output of the Mediacast Router while we’re here:

Camera Presets
One thing that confused me at first in Q-SYS was how to store camera presets. QSC has a lot of good training videos that cover nearly every topic, so eventually you’ll learn they do this using snapshots. Snapshots are capable of grabbing pretty much any control and saving/restoring values to it.
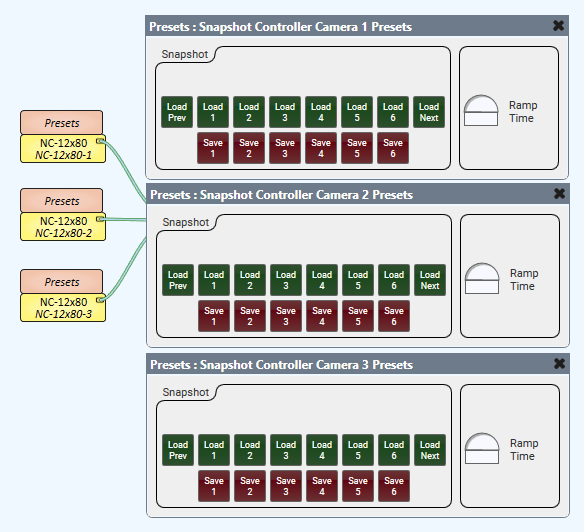
I generally like to give 6 presets per camera, so to do that, we’ll need to add a snapshot bank per camera. Like this:
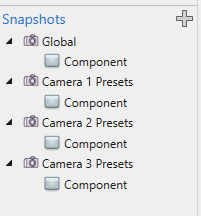
I rename the banks so I know what I’m saving in them, but the names aren’t so important for what we’re doing. Drag them into the design:
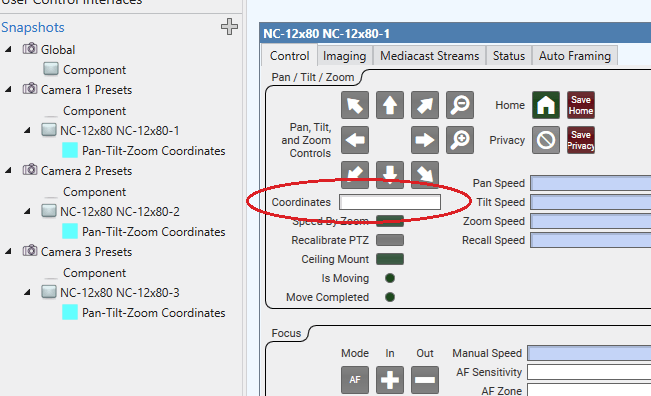
Now, we need to open each camera block and drag the coordinates into the corresponding snapshot. Isn’t that clever? We save/recall the camera coordinates and that’s the preset! Of course, we could grab any number of camera attributes and save them as well (backlight compensation, focus, auto-framing, etc). It’s so flexible, it blows my mind. Where was I? Oh yeah, make sure you have at least this saved in your snapshot banks:
Problem
OK, we’ve got our cameras, our presets, and our named controls. But how to we save presets to the active camera? With 6 presets per camera, that gives us 12 buttons (Load/Save) per camera, for a total of 36 buttons we need to consider:
We could keep track of the active camera outside of Q-SYS and remember which set of named controls we need to interact with, but that still means dragging 36 buttons to the Named Controls window and giving them all names. What happens if we add another camera? Now we need to add 12 more Named Controls for that one. It feels like there is a better way to approach this!
Q-SYS Controlling Q-SYS
Lua to the rescue! I’m pretty sure the name of the online course is “Q-SYS Controlling Q-SYS” but it’s a set of videos that walk through scripting Q-SYS within Q-SYS. I think this becomes very powerful when you want to create a new block to tie a bunch of things together.
Lets add a Text Controller to our design. Don’t worry if you don’t have a scripting license, you can always use Emulator Mode to test out your scripts. Another brilliant idea that Q-SYS gets right!
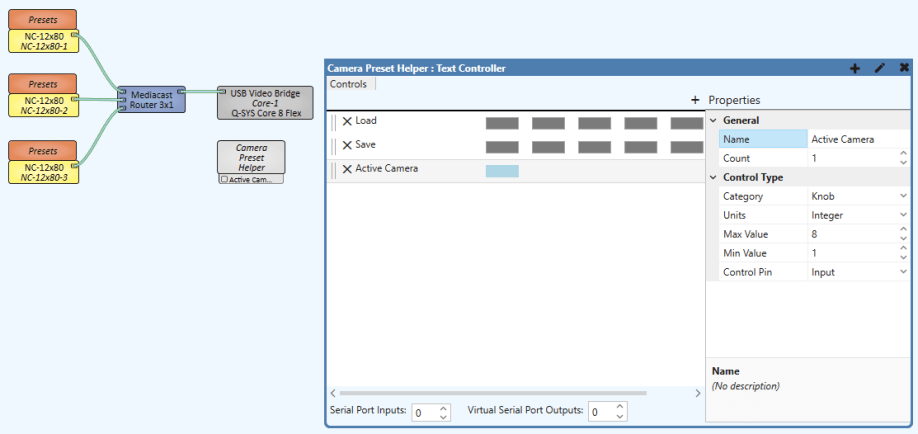
I’ve renamed my Text Controller to Camera Preset Helper. I’ve added the following controls to it:
| Load | Trigger Button | Qty 6 |
| Save | Trigger Button | Qty 6 |
| Active Camera | Knob Integer | Min: 1, Max: 8 |
I’ve also exposed Active Camera as an input control pin so we can wire that to the selected camera on the Mediacast Router. Expose the Select pin on the router so you can wire the two together:
Back in the Text Controller block, click the pencil icon to open the script editor. And we’re greeted with… a blank slate!
Apologies if the syntax highlighting is weird in this post, WordPress doesn’t seem to support Lua out of the box. I’m using Ruby highlighting, hoping for the best.
What do we do with our Lua script? How do we control anything? If you press F1 with the Text Controller selected, it will take you to the help file with references and examples. It’s a pretty good starting point. We’ve defined some controls, so lets look at handling those events:
Controls['Active Camera'].EventHandler = function (ctl)
  -- do something with active camera
end

Controls['Load'][1].EventHandler = function (ctl)
  -- do something with Load 1
end

Controls['Save'][1].EventHandler = function (ctl)
  -- do something with Save 1
end
Remember the Load and Save controls are actually arrays: we defined 6 buttons for each. Lua calls these tables. We reference [1] … [6] on those controls to get to specific buttons. So what we really want is an event handler assigned to each button. An easy way to do this in Lua is by looping over each button in the control group:
Controls['Active Camera'].EventHandler = function ()
  -- do something with active camera
end

for i, btn in ipairs(Controls['Load']) do
  btn.EventHandler = function ()
    -- do something with Load
  end
end

for i, btn in ipairs(Controls['Save']) do
  btn.EventHandler = function ()
    -- do something with Load
  end
end
Each pass through the for loop will set i to the table index and btn to the control at that index. We can assign an EventHandler to each button this way.
We have an event handler ready to go, but what do we put into it? We want to either load or save the correct snapshot for the active camera. So we should probably do something with the active camera input first.
Components
If we go back to the schematic view and click one of the snapshots, we can see on the properties window a thing called Script Access:
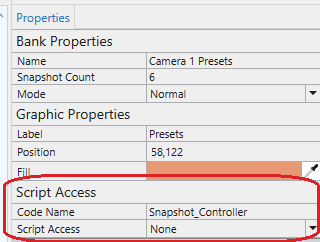
Put Camera 1 Presets into Code Name, and you should see Script Access change to All:

Do the same thing for the other snapshot blocks; name them Camera 2 Presets and Camera 3 Presets. Having names and access will allow our Lua script to reference these design components.
Back in the Text Controller window, we’re going to build a new table to keep track of each of these components:
CameraPresets = {}

CameraPresets[1] = Component.New('Camera 1 Presets')
CameraPresets[2] = Component.New('Camera 2 Presets')
CameraPresets[3] = Component.New('Camera 3 Presets')
CameraPresets[4] = nil
CameraPresets[5] = nil
CameraPresets[6] = nil
CameraPresets[7] = nil
CameraPresets[8] = nil

Controls['Active Camera'].EventHandler = function ()
  -- do something with active camera
end

for i, btn in ipairs(Controls['Load']) do
  btn.EventHandler = function ()
    -- do something with Load
  end
end

for i, btn in ipairs(Controls['Save']) do
  btn.EventHandler = function ()
    -- do something with Load
  end
end
Why 8 entries? Our Active Camera input has a valid range from 1 to 8 (set when we created it). nil is used to represent an empty value, so I put those on the entries that don’t map to any cameras in our design.
And lets make sure we start out by pointing to the correct snapshot:
CameraPresets[7] = nil
CameraPresets[8] = nil

ActiveCameraPreset = CameraPresets[Controls['Active Camera'].Value]

Controls['Active Camera'].EventHandler = function ()
  ActiveCameraPreset = CameraPresets[Controls['Active Camera'].Value]
end
We’ve also updated the event handler if Active Camera changes. We’ll take the value of Active Camera (1-8) and index into our CameraPresets table (1-8) which sets ActiveCameraPreset to the snapshot component in our design.
We’ve got ActiveCameraPreset set correctly, but what do we do with it? How do we load or save snapshots? For that information, we need to go back to the schematic design and turn on Component Controls Info:

When we click on one of the snapshot blocks, now we get a bunch of component information:
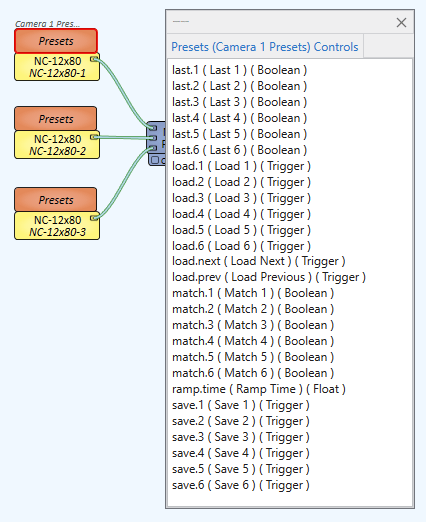
See we have load.1, load.2, load.3, etc? Those are trigger buttons. We can call those on ActiveCameraPreset in our script and it’s the same as pushing that button in our design!
Closure
This is the end of this post, and a closure is also the trick we’re going to use to save/load the correct snapshot based on which button is pressed. Update our event handlers with this:
for i, btn in ipairs(Controls['Load']) do
  btn.EventHandler = function ()
    if ActiveCameraPreset then
      ActiveCameraPreset["load." .. i]:Trigger()
    end
  end
end

for i, btn in ipairs(Controls['Save']) do
  btn.EventHandler = function ()
    if ActiveCameraPreset then
      ActiveCameraPreset["save." .. i]:Trigger()
    end
  end
end
As we loop over the controls, we get 2 variables: i and btn. We’ve already used btn to assign a function to the EventHandler, now we need to use i.
A cool thing happens inside of our function though: it saves the value of i at the time it was created. It’s a closure, so it closes over the variable and saves it! We end up creating 6 functions for the Load buttons, but each function remembers a different value for i. You can read more about this in Programming in Lua where it is explained much better.
Anyways, we can use the value of i to grab the trigger buttons in our snapshot block. First we check if ActiveCameraPreset is set to a value (does it actually point to a snapshot block or is it nil?) then we index into the table to either “load.1”, “load.2”, “load.3” etc. We can build that string using the .. operator. To press the button though, we call :Trigger() on it.
Reusable Code
I lied, one last section here. Before we save this as a User Component, lets name the components in our Text Controller. Drag the buttons over to the Named Controls window and give them appropriate names:
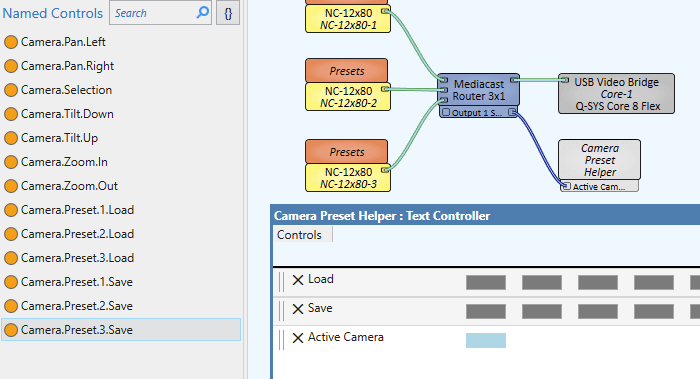
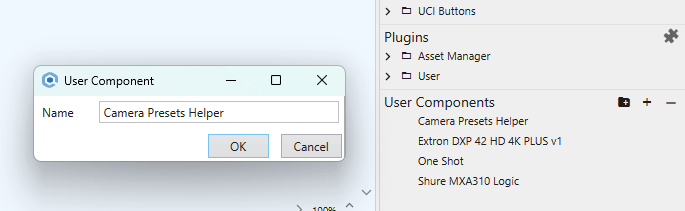
Drag the whole Text Controller block over to the User Components and you can save it with a name. Now you can quickly drop this into any design where you might have to control cameras from Crestron, AMX, etc.
You can download a copy of my file if you’d like to see how I ended up. Thanks for reading!

If you wanted to make the camera setup more dynamic, you could toss it into a for loop. This way if the number of cameras increases, you can just adjust the amount of times the for loop runs instead of setting it up in the top.
for i = 1, 3 do
table.insert(
CameraPresets, Component.New('Camera '..i..' Presets'))end
LikeLiked by 1 person
Thanks, Doug, that’s a great tip! I usually misspell something then I get working logic for cameras 1 and 3 but not 2. Building the names in a loop would definitely help me reduce mistakes like that. Thanks again!
LikeLike