In the last part, we got a program loaded to our VC-4 server, started it, and that’s all it did. This time, we’re going to add an XPanel so we can interact with the system.
Starting from our template, let’s add the following lines to get an XPanel connected:
using System;
using Crestron.SimplSharp;
using Crestron.SimplSharpPro;
using Crestron.SimplSharpPro.CrestronThread;
using Crestron.SimplSharpPro.Diagnostics;
using Crestron.SimplSharpPro.DeviceSupport;
using Crestron.SimplSharpPro.UI;

namespace Vc4Test1
{
    public class ControlSystem : CrestronControlSystem
    {
        private XpanelForSmartGraphics tp1;

        public ControlSystem()
            : base()
        {
            try
            {
                Thread.MaxNumberOfUserThreads = 20;
            }
            catch (Exception e)
            {
                ErrorLog.Error("Error in ControlSystem constructor: {0}", e.Message);
            }
        }

        public override void InitializeSystem()
        {
            try
            {
                tp1 = new XpanelForSmartGraphics(0x03, this);
                tp1.SigChange += tp_SigChange;
                tp1.Register();
            }
            catch (Exception e)
            {
                ErrorLog.Error("Error in InitializeSystem: {0}", e.Message);
            }
        }

        public void tp_SigChange(BasicTriList dev, SigEventArgs args)
        {
        }
    }
}
Since I haven’t figured out how to upgrade a program yet, just delete out the old one from the Program Library on VC-4. Upload this version, recreate our test room, and it will start back up. I swear there’s got to be a better way!
Update 6/2/20: See the update in Part 1 for how to upload changes to programs without having to delete out everything and recreate it. So much easier!
Connect an XPanel
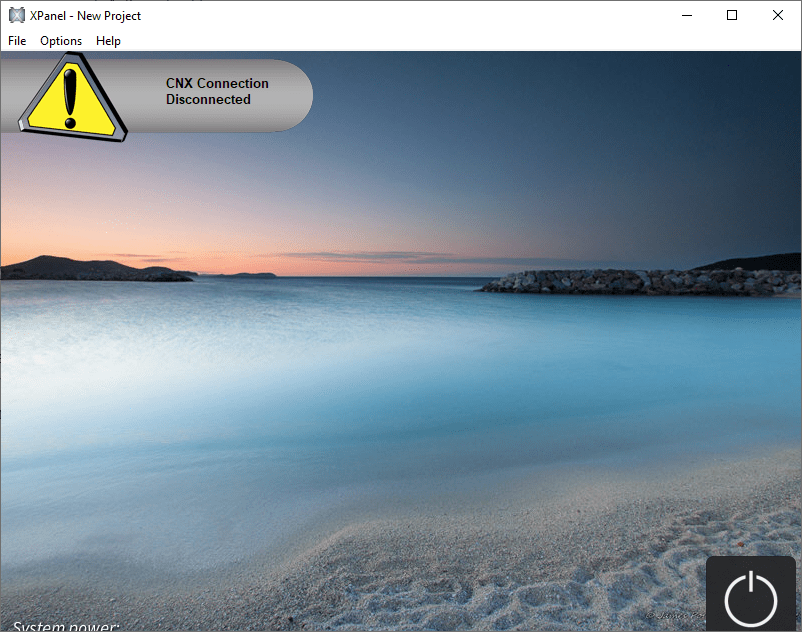
Now that our program is running, lets try connecting our XPanel to it:
Remember, we could have hundreds of rooms all running the same program, all expecting an XPanel to connect on IP ID 03. Another field was added to differentiate which room this panel is connecting from. We created this field when we added the room:
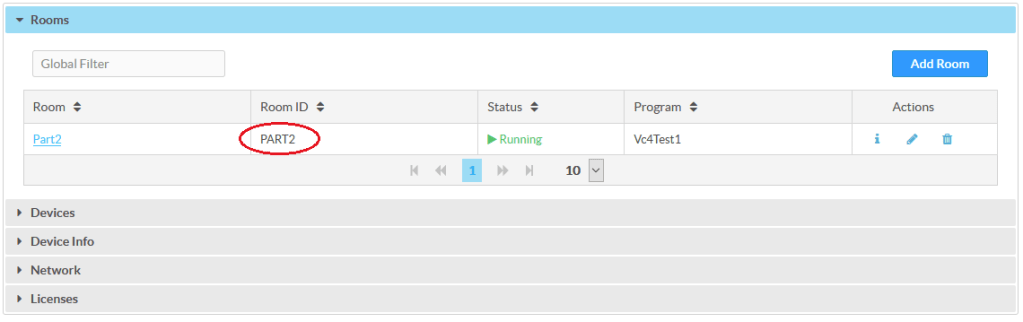
You might have used something different, but I went with PART2 since I figured I’ll have to create a new one of these for each part of this series. In our XPanel connection settings, we can enter this Room ID and the panel should connect:

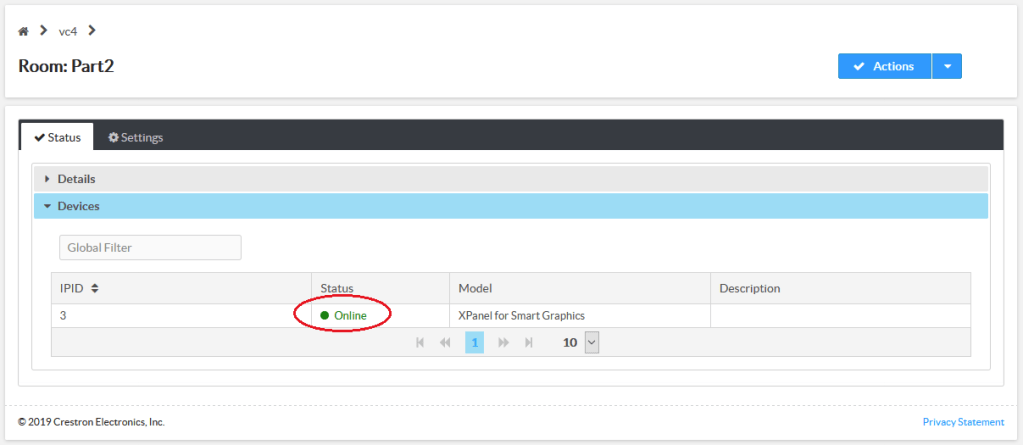
Ta-da! Our room status now shows a connected XPanel:
Make It Do Something
OK, lets make that Power button do something! Lets add the following code to our InitializeSystem method:
public override void InitializeSystem()
{
    try
    {
        tp1 = new XpanelForSmartGraphics(0x03, this);
        tp1.SigChange += tp_SigChange;
        tp1.BooleanOutput[12].UserObject = new Action<bool>(b => { if (b) ToggleSystemPower(); });
        tp1.Register();
    }
    catch (Exception e)
    {
        ErrorLog.Error("Error in InitializeSystem: {0}", e.Message);
    }
}
What did we do here? This is an approach a lot of SIMPL# programmers seem to take: we attach a callback right to our signal. Every signal has a UserObject that we’re free to do whatever we want with. Here we’re assigning a new Action<bool> delegate to it. If we call this delegate later, it will execute the lambda expression if (b) ToggleSystemPower(); so we need to add a call to it in our tp_SigChange handler:
public void tp_SigChange(BasicTriList dev, SigEventArgs args)
{
    var obj = args.Sig.UserObject;

    if (obj is Action<bool>)
    {
        var func = (Action<bool>)obj;
        func(args.Sig.BoolValue);
    }
}
Remember that tp_SigChange will be called for every signal change our XPanel makes, this includes signals where we didn’t define a custom UserObject. We need to check to make sure that the UserObject attached to this signal is an Action<bool> delegate. If it is, we can cast it to a new variable named func and call it. Of course, we want to tell it the value of our signal, so we pass in args.Sig.BoolValue.
What happens when we call func(args.Sig.BoolValue)? An Action delegate passes the arguments to the function we defined and the result looks like this:
if (args.Sig.BoolValue)
{
    ToggleSystemPower();
}
We need to define the ToggleSystemPower method, so lets add that to the bottom of our class:
void ToggleSystemPower()
{
    bSystemPowerOn = !bSystemPowerOn;

    tp1.BooleanInput[10].BoolValue = bSystemPowerOn;
    tp1.BooleanInput[11].BoolValue = !bSystemPowerOn;
}
We toggle the value of bSystemPowerOn then set joins 10 and 11 for Power On and Power Off feedback, respectively. Lets add bSystemPowerOn to our class, just below where we defined our XPanel:
public class ControlSystem : CrestronControlSystem
{
    private XpanelForSmartGraphics tp1;
    private bool bSystemPowerOn;
And lets make sure we default to the system powered off:
public ControlSystem()
    : base()
{
    try
    {
        Thread.MaxNumberOfUserThreads = 20;

        // System defaults to OFF
        bSystemPowerOn = false;
    }
    catch (Exception e)
    {
        ErrorLog.Error("Error in ControlSystem constructor: {0}", e.Message);
    }
}
Now when you push the Power button in the lower right corner, the background will brighten or dim depending on the system power state.
Remember, if you want to view the complete program or download the XPanel, it’s available in my GitHub.
