
At long last, Crestron has an updated XPanel that doesn’t rely on Adobe Flash! Unfortunately, there are some issues surrounding it regarding the licensing, but there is a free 60-day trial period that should hopefully get us through this series of posts!
Prerequisites
First and foremost, you need an actual 3- or 4-series control system (hardware appliance) to play around with the HTML5 XPanel. This won’t work with VC-4 right now unless you also have Room Licenses in XiO Cloud. This may change in the future, but this seems to be how Crestron allows testing right now.
Connect to your controller using Text Console in Toolbox. Issue the following command:
CP4> crestrononetpr
Trial period remaining in days: 60
If you see that your trial period has expired, you’ll need to do a factory restore to reset it. Type restore in Text Console if you need to go this route. You’ll lose all the settings on your controller, though.
The other setting we need to check is:
CP4> webserver allowsharedsession onTechnically, you only need to do this if using a non-CA-signed certificate (such as the default self-signed one). If you just did a restore, then you’re back to using the self-signed certificate anyway. Later, when we try to connect our XPanel, it will fail due to the self-signed certificate and try to redirect us to the sign-in page. If we sign into our processor using the same browser session, we should be able to stay logged in. Thus, “allow shared session” needs to be turned on.
git pull
Hopefully, you’ve already cloned my GitHub repository and can follow along with actual code. Every time I start a new post, I like to open Git Bash and type:
$ git pull
Already up to date.
This lets me know my repository is up to date and I’m not going to introduce merge conflicts down the line. Just wanted to throw this in somewhere, especially if you already have the code, you can quickly pull down any updates I’ve made.
And if you’re typing in everything by hand, good! That’s the way I learn best (especially when I copy something down wrong).
SIMPL Windows
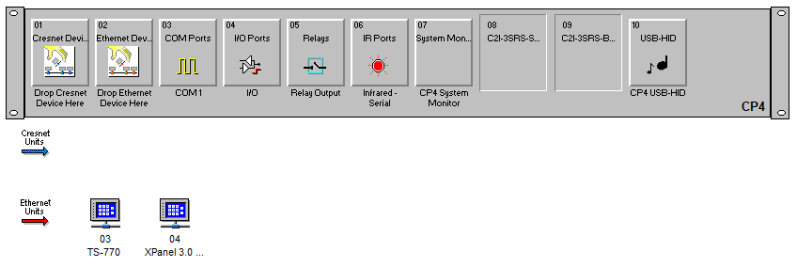
We’ll modify the SIMPL Windows program we wrote in the last post (since it’s easier to update). Add an XPanel 3.0 Crestron HTML5 symbol to IP ID 04.
Go to the Project > Manage GUI Extenders menu and add our contract to the XPanel symbol.
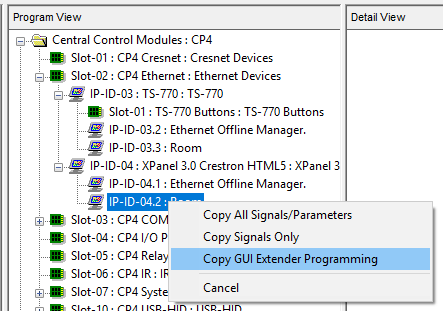
Next, right-click-and-drag from the TS-770 Room component to the XPanel Room component. Select Copy GUI Extender Programming from the pop up menu.
Now our TS-770 and XPanel should mirror one other.
Build the program and load it to your processor. Now, we just need an XPanel!
CH5-WebXPanel
Open the project folder in VS Code. Open a new Terminal window and type:
> npm install @crestron/ch5-webxpanelCommit the changes to git. Open src/app.js and add XPanel support. We’re pretty much rewriting the file:
const webXpanel = require('../node_modules/@crestron/ch5-webxpanel/dist/cjs/index.js');

const configuration = {
    host: '192.168.1.13',
    ipId: '4'
};

if (webXpanel.isActive) {
    console.log(`WebXPanel version: ${webXpanel.getVersion()}`);
    console.log(`WebXPanel build date: ${webXpanel.getBuildDate()}`);

    webXpanel.default.initialize(configuration);
}
else {
    console.log('Skipping WebXPanel since running on touchpanel');
}

const CrComLib = require('../node_modules/@crestron/ch5-crcomlib/build_bundles/cjs/cr-com-lib.js');

window.CrComLib = CrComLib;
window.bridgeReceiveIntegerFromNative = CrComLib.bridgeReceiveIntegerFromNative;
window.bridgeReceiveBooleanFromNative = CrComLib.bridgeReceiveBooleanFromNative;
window.bridgeReceiveStringFromNative = CrComLib.bridgeReceiveStringFromNative;
window.bridgeReceiveObjectFromNative = CrComLib.bridgeReceiveObjectFromNative;
Crestron offers their libraries in 3 flavors: CommonJS, AMD, and UMD. Since Webpack works with all 3, I’m going to stick with CommonJS (cjs) for now since it’s the easiest to use. There is an advantage to using AMD or UMD where Webpack can prune code that isn’t used, so we’ll look into using that later.
Lines 4 – 5 define our XPanel configuration. This is the IP address of our control processor and the IP ID we’ve assigned to the XPanel symbol in the SIMPL Windows program.
Line 8 checks to see if XPanel is available (the field is named isActive). If this project is loaded to a touchpanel, isActive will be false so we can skip running the XPanel on the touchpanel. Confusing, I know.
Line 12, we pass our configuration into the XPanel library to initialize it.
Line 18, we include the CrComLib which handles all the communication with CH5 components and the control system. One thing I noticed I had to do was make sure CrComLib was globally accessible, so I assign this to the window object on line 19.
NPM Scripts
Previously, we were doing a lot of typing of commands in Terminal. I prefer doing that when it’s one or two things we have to enter, especially because you can use the up arrow to review your history. But it’s better to build everything in one step. So we’re going to add some scripts to the package.json file:
"scripts": {
  "build": "webpack",
  "archive": "ch5-cli archive -p project -d dist -o archive -c ./contracts/output/General/interface/mapping/General.cse2j",
  "onestep": "npm run build && npm run archive",
  "test": "echo \"Error: no test specified\" && exit 1"
},
To build our touchpanel layout now, we can either click the Run button next to onestep in the NPM Scripts window, or in Terminal we can type:
> npm run onestepOnce this completes, use Toolbox to send project.ch5z to the control processor using Web Projects in Easy Config:

Open Your Web Browser
I recommend using Chrome since it’s the same browser used on the touchpanels. When you go to the address of your control processor, you should see some familiar buttons. But most likely, nothing will be working. If you open Developer Tools (F12), you can see why in the Console:
[WXP] 2021-07-23T19:04:11.468Z Error on WebSocket token retrieval:
Error: Not authorized to fetch WebSocket token.  Redirected to https://192.168.1.13/userlogin.html
We need to login to the control processor first. You can do this by going to https://processor-ip/userlogin.html. Once you authenticate, you should be redirected and have a working XPanel page!
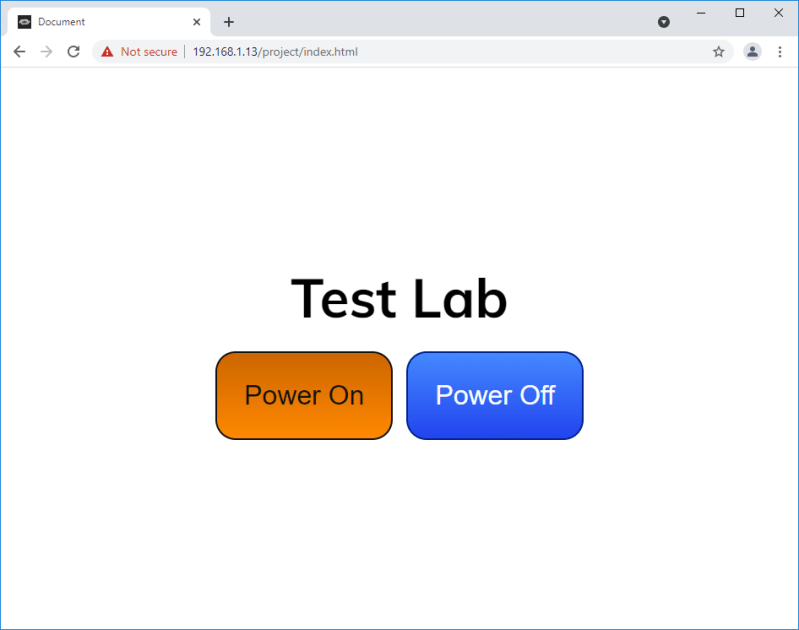
If your touchpanel is awake, you’ll see the button feedback change as you press buttons on the XPanel.
Summary
This was just a quick exploration to see how to take the same layout used on the touchpanel and add support for XPanel. We learned:
- How to check if our trial period has expired using crestrononetpr
- How to work with authentication on the 4-series processors
- Adding XPanel support to our project (when we aren’t running on a touchpanel)
- Simplifying deployment with NPM scripts
In the next post, we’ll dig deeper into JavaScript and abandon the Contract Editor layout (ah! we hardly knew ye). We’ll start to put together the basic layout that’s going to carry us through six different room types. Should be fun, and a ton of code. Thanks for reading!

Hello,
When I run the npm install @crestron/ch5-webxpanel, the terminal replies with the following:
changed 2 packages, and audited 174 packages in 6s
22 packages are looking for funding
4 vulnerabilities (2 high, 2 critical)
Some issues need review, and may require choosing
a different dependency.
Run `npm audit` for details.
I am not sure if this the cause of the issue I am experiencing, but when I upload the generated ch5z to my RMC3 processor, it says in toolbox that this is a MobileApp project, and not a Xpanel…
Any idea?
LikeLike
I’ll have to see what it looks like when I load the project. It’s been a while since I’ve tested this so I might have to factory restore my RMC3 to reset the XPanel trial period, too. I’ll update you once I’ve given it a try.
LikeLike
I reset my git tree to commit 132895e and rebuilt project.ch5z. Loading it in Toolbox, make sure to select Project Format = ‘Archived File’, Storage Location = ‘Internal Flash’, and Load Project As = ‘CH5 XPanel’. I think it defaults to ‘CH5 Mobile’ which does show up as MobileApp in the project list. And I still have to use Chrome to get the button feedback to work at all.
LikeLike