This is the final post in this series, and we’re going to add some finishing touches to the user interface. One thing that’s been bothering me is that our system instantly turns on and off. This doesn’t work in the real world: equipment takes a moment to turn on and off. Even if we don’t match the exact status of the equipment (it’s all faked in our program anyway), it’s good to have a minimal startup and shutdown time to prevent the user from getting things into an unknown state.
Other posts in this series:
- NetLinx: Getting Started
- NetLinx: Your First Program
- NetLinx: Testing
- NetLinx: SNAPI
- NetLinx: Modules
- NetLinx: A Real Program
Before we get started, you should download the latest TP4 layout from GitHub. I’ve added a “busy” page where the system shows it’s working on something:
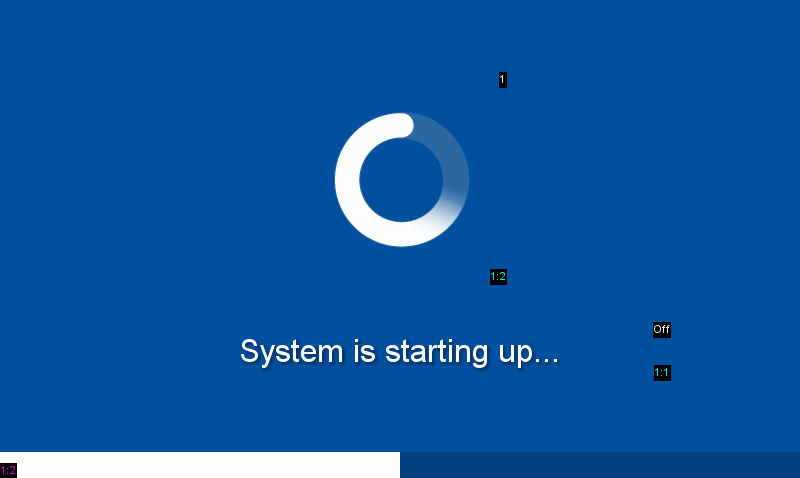
Notice we have a few different button types here:
- A big multistate button to show a spinning graphic (notice the 1 in the top-right corner of it) – it’s on port 1, address 2 (cyan)
- A static button to display some text in the middle – it’s on port 1, address 1 (cyan)
- A bargraph across the bottom to show progress – it’s on port 1, level 2 (purple)
Trial Run
Before we do any programming updates, lets use NetLinx Studio to try out our new page. From the Diagnostics menu, go to Control a Device. You’ll see the Control a Device pop up. Fill in the correct device address for the touchpanel (10001:1:0). Make sure Message Type at the bottom is set to Command. Then type ADBEEP into the Message window and hit Send to Device. You should hear the touchpanel double-beep:

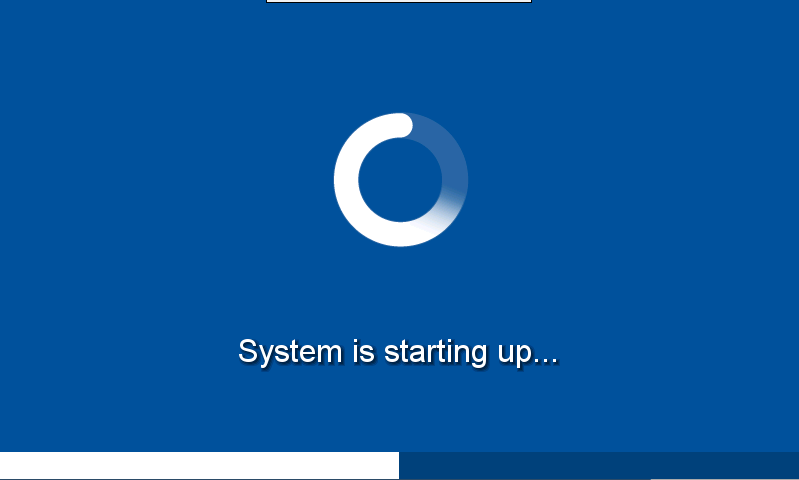
Enter PAGE-Wait into the Message window and hit Send to Device. The touchpanel will flip to our new page:

You’ll notice that our loading graphic isn’t spinning. To get that started, we need to send a ^ANI-2,1,12,10 command. This command says to animate button on address 2, going from state 1 to state 12, and to take 1 second to do it (10 in tenths of a second). The swirl will animate once and stop. You can also run the animation backwards by swapping 1 and 12 in the command. If our busy state takes longer than 1 second, we’ll have to think about triggering this animation a few times.
The next thing to consider is the bargraph at the bottom of the page. The bargraph is designed to go from 0 to 10 (set in the button properties). So if send 5, we should get 50%. In the Control a Device pop up, in the Level group, set Level to 2, Value to 5, and Type to INTEGER. Hit Send. The bargraph should look like this:
You can play around with different values to see how much the bargraph fills up. We’ll animate this during system startup and shutdown to give the user an idea of how much longer they need to wait.
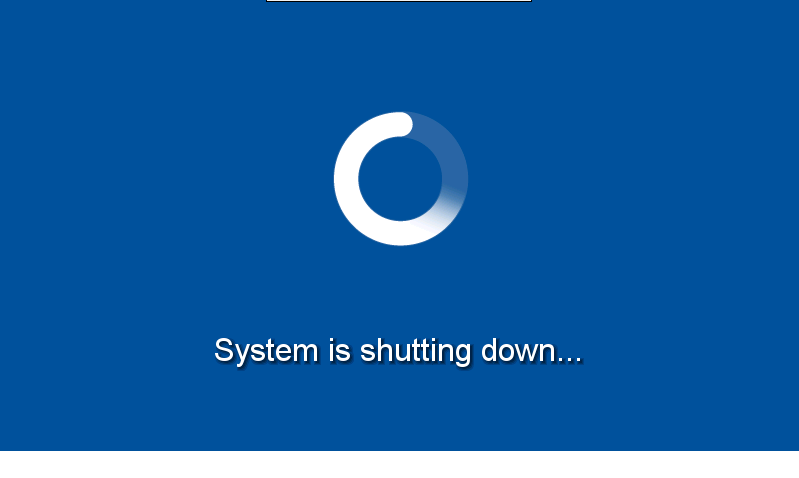
And last, we may want to put different messages on this page. We can use ^TXT-1,0,System is shutting down... to set a new status message. This changes the text on button with address 1, all states (0):
That’s it! We’ve got all the makings for a fleshed-out interface, now we just have to add some code to drive it.
Timelines
We’re going to use a couple of timelines to drive the UI when the system turns on and off. The good news is, we only need to update Room System.axs to add this functionality:
DEFINE_DEVICE

dvCONSOLE = 0:1:0	// Master Controller

(***********************************************************)
(*               CONSTANT DEFINITIONS GO BELOW             *)
(***********************************************************)
DEFINE_CONSTANT

TL_STARTUP  = 1
TL_SHUTDOWN = 2

(***********************************************************)
(*                  INCLUDE FILES GO BELOW                 *)
(***********************************************************)

#INCLUDE 'SNAPI'
Remember that modules are self-contained little programs. Here we’ve created another constant named TL_STARTUP that has a value of 1. But we already have TL_LOOP in Main Program.axs with a value of 1! It’s OK, they’re still considered different timelines even though they look like they have the same ID because they’re used in different modules. We could have 10 copies of our Room System module in Main Program, and each of those modules will keep track of their own timelines. NetLinx is a very well-designed platform!
Now we need to do some thinking about how many times we want our timeline to trigger. Say we want to lock out the panel for just a couple of seconds, we could create a timeline sequence like:
(***********************************************************)
(*                  INCLUDE FILES GO BELOW                 *)
(***********************************************************)

#INCLUDE 'SNAPI'

(***********************************************************)
(*               VARIABLE DEFINITIONS GO BELOW             *)
(***********************************************************)
DEFINE_VARIABLE

LONG lWaitTimes[] = { 200, 200, 200, 200, 200,
                      200, 200, 200, 200, 200 }

(***********************************************************)
(*                 STARTUP CODE GOES BELOW                 *)
(***********************************************************)
DEFINE_START
We’ll fire our timeline event every 200ms (so 5 times a second) and in total it will take 2 seconds to run. Since our busy animation takes 1 second to run, we can trigger it again halfway through our timeline.
We want to start our timelines when the room power state changes. That happens in our channel event, so let’s rewrite it like this:
CHANNEL_EVENT[vdvROOM,POWER_FB]
{
    ON:
    {
	    SEND_COMMAND dvTP,'PAGE-Wait'
        SEND_COMMAND dvTP,'^ANI-2,1,12,10'
	    SEND_COMMAND dvTP,'^TXT-1,0,System is starting up...'
	    SEND_LEVEL dvTP,2,0

	    TIMELINE_CREATE(TL_STARTUP, lWaitTimes, LENGTH_ARRAY(lWaitTimes),
	        TIMELINE_RELATIVE, TIMELINE_ONCE)
    }
    OFF:
    {
	    SEND_COMMAND dvTP,'PAGE-Wait'
        SEND_COMMAND dvTP,'^ANI-2,1,12,10'
	    SEND_COMMAND dvTP,'^TXT-1,0,System is shutting down...'
	    SEND_LEVEL dvTP,2,0

	    TIMELINE_CREATE(TL_SHUTDOWN, lWaitTimes, LENGTH_ARRAY(lWaitTimes),
	        TIMELINE_RELATIVE, TIMELINE_ONCE)
    }
}
Both ON and OFF channel events will flip to our wait page, start the animation, set the appropriate text, and reset the progress bar. Now we need to create the timeline events to animate everything. Add these just below the channel event:
TIMELINE_EVENT[TL_STARTUP]
{
    SEND_LEVEL dvTP,2,TIMELINE.SEQUENCE

    SWITCH (TIMELINE.SEQUENCE)
    {
	    CASE 5:
	    {
	        SEND_COMMAND dvTP,'^ANI-2,1,12,10'
	    }
	    CASE 10:
	    {
	        SEND_COMMAND dvTP,'PAGE-Main'
	        SEND_COMMAND dvTP,'@PPX'
	        SEND_COMMAND dvTP,'@PPN-Source Selection'
	    }
    }
}

TIMELINE_EVENT[TL_SHUTDOWN]
{
    SEND_LEVEL dvTP,2,TIMELINE.SEQUENCE

    SWITCH (TIMELINE.SEQUENCE)
    {
	    CASE 5:
	    {
	        SEND_COMMAND dvTP,'^ANI-2,1,12,10'
	    }
	    CASE 10:
	    {
	        SEND_COMMAND dvTP,'PAGE-Main'
	        SEND_COMMAND dvTP,'@PPX'
	        SEND_COMMAND dvTP,'@PPN-Start System'
	    }
    }
}
Looks like a lot of repeated code, doesn’t it? For both startup and shutdown, we update the progress bar by sending it the TIMELINE.SEQUENCE value (that goes from 1 to 10). If we’re on the 5th pass, we need to restart our button animation. If we’re on the 10th and final pass, we need to flip back to the Main page, close all pop ups, then show the correct pop up. You can build this and load it to your controller to test it, but I think we can eliminate a lot of duplication here.
Don’t Repeat Yourself
Normally, you would have difference sequences for power on and power off, but we’re just handling touchpanel animation and page flips here, so there’s no harm in combining them. Lets only use one timeline to handle both events:
DEFINE_CONSTANT

TL_WAIT = 1
We can get rid of TL_STARTUP and TL_SHUTDOWN and just use TL_WAIT. In our channel event, we need to use this new identifier when creating timelines:
CHANNEL_EVENT[vdvROOM,POWER_FB]
{
    ON:
    {
	    SEND_COMMAND dvTP,'PAGE-Wait'
    	SEND_COMMAND dvTP,'^ANI-2,1,12,10'
	    SEND_COMMAND dvTP,'^TXT-1,0,System is starting up...'
    	SEND_LEVEL dvTP,2,0

	    TIMELINE_CREATE(TL_WAIT, lWaitTimes, LENGTH_ARRAY(lWaitTimes),
	        TIMELINE_RELATIVE, TIMELINE_ONCE)
    }
    OFF:
    {
	    SEND_COMMAND dvTP,'PAGE-Wait'
	    SEND_COMMAND dvTP,'^ANI-2,1,12,10'
	    SEND_COMMAND dvTP,'^TXT-1,0,System is shutting down...'
	    SEND_LEVEL dvTP,2,0

	    TIMELINE_CREATE(TL_WAIT, lWaitTimes, LENGTH_ARRAY(lWaitTimes),
	        TIMELINE_RELATIVE, TIMELINE_ONCE)
    }
}
Then we can rewrite the two timeline event handlers into one:
TIMELINE_EVENT[TL_WAIT]
{
    SEND_LEVEL dvTP,2,TIMELINE.SEQUENCE

    SWITCH (TIMELINE.SEQUENCE)
    {
	    CASE 5:
	    {
	        SEND_COMMAND dvTP,'^ANI-2,1,12,10'
	    }
	    CASE 10:
	    {
	        SEND_COMMAND dvTP,'PAGE-Main'
	        SEND_COMMAND dvTP,'@PPX'

	        IF ([vdvROOM,POWER_FB])
	        {
		        SEND_COMMAND dvTP,'@PPN-Source Selection'
	        }
	        ELSE
	        {
		        SEND_COMMAND dvTP,'@PPN-Start System'
	        }
	    }
    }
}
Build your workspace and send it to your controller. It works! There are definitely other areas where we could eliminate some code repetition in this module, but I think this is enough to worry about for now.
Summary
We made it! This was a short series of posts to cover getting up and running with AMX and NetLinx programming. Some of the things we learned along the way:
- Creating a new project workspace
- Communicating with a control processor
- How device numbering works
- What port numbers map to on different devices
- Using virtual devices in our programs
- Emulating devices when we don’t have physical access to them to test
- SNAPI channel numbers
- How to write our own modules and link them to our program
- Hiding implementation details inside modules
- Adding touchpanel flow and animations with timelines
Give yourself a pat on the back. If you’re interested in reading more about NetLinx programming, here are some links:
Thanks for reading!

5 thoughts on “NetLinx: A Real Program”